I wondered if doing a video tutorial would be a better idea: then I decided to stick to my own style. I think my pictures are very clear and if at any time you have a doubt, referring to pictures is easier than referring to a Kutch work video tutorial. So here I am with my next batch of pictures. They are time consuming - but worth all the time and effort I've put into them.
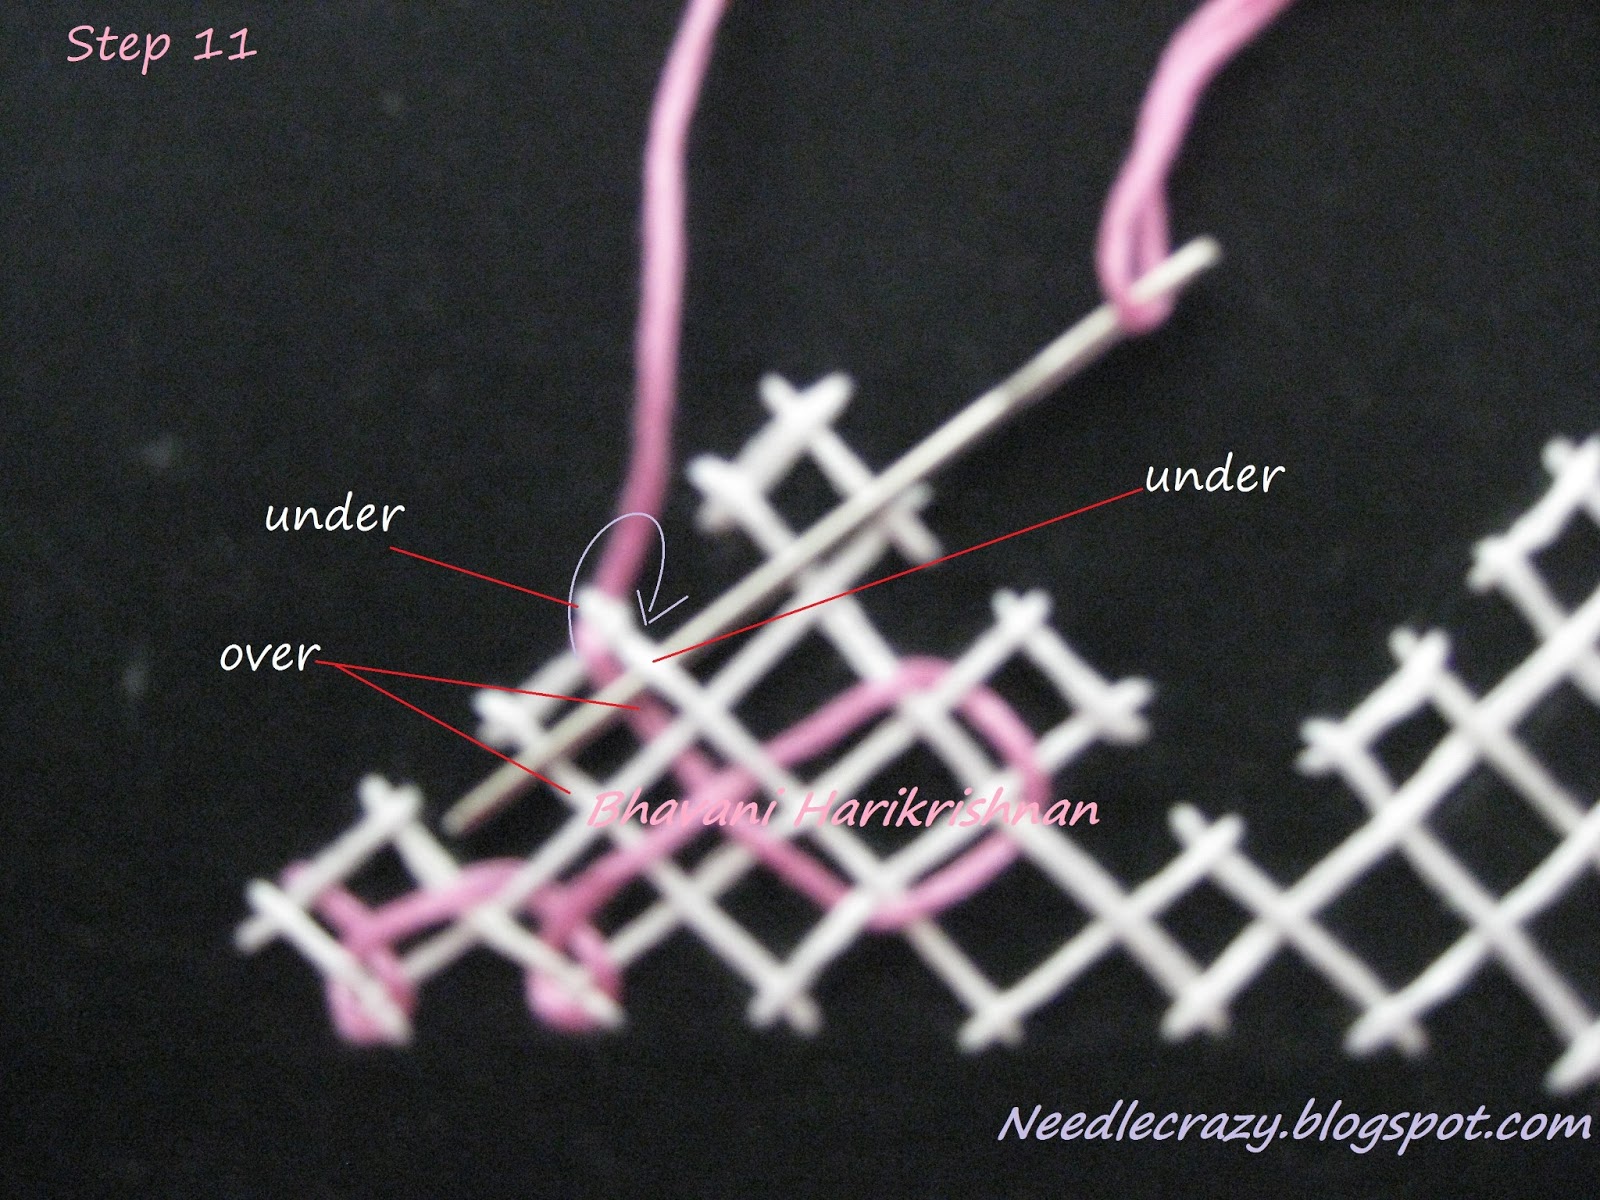
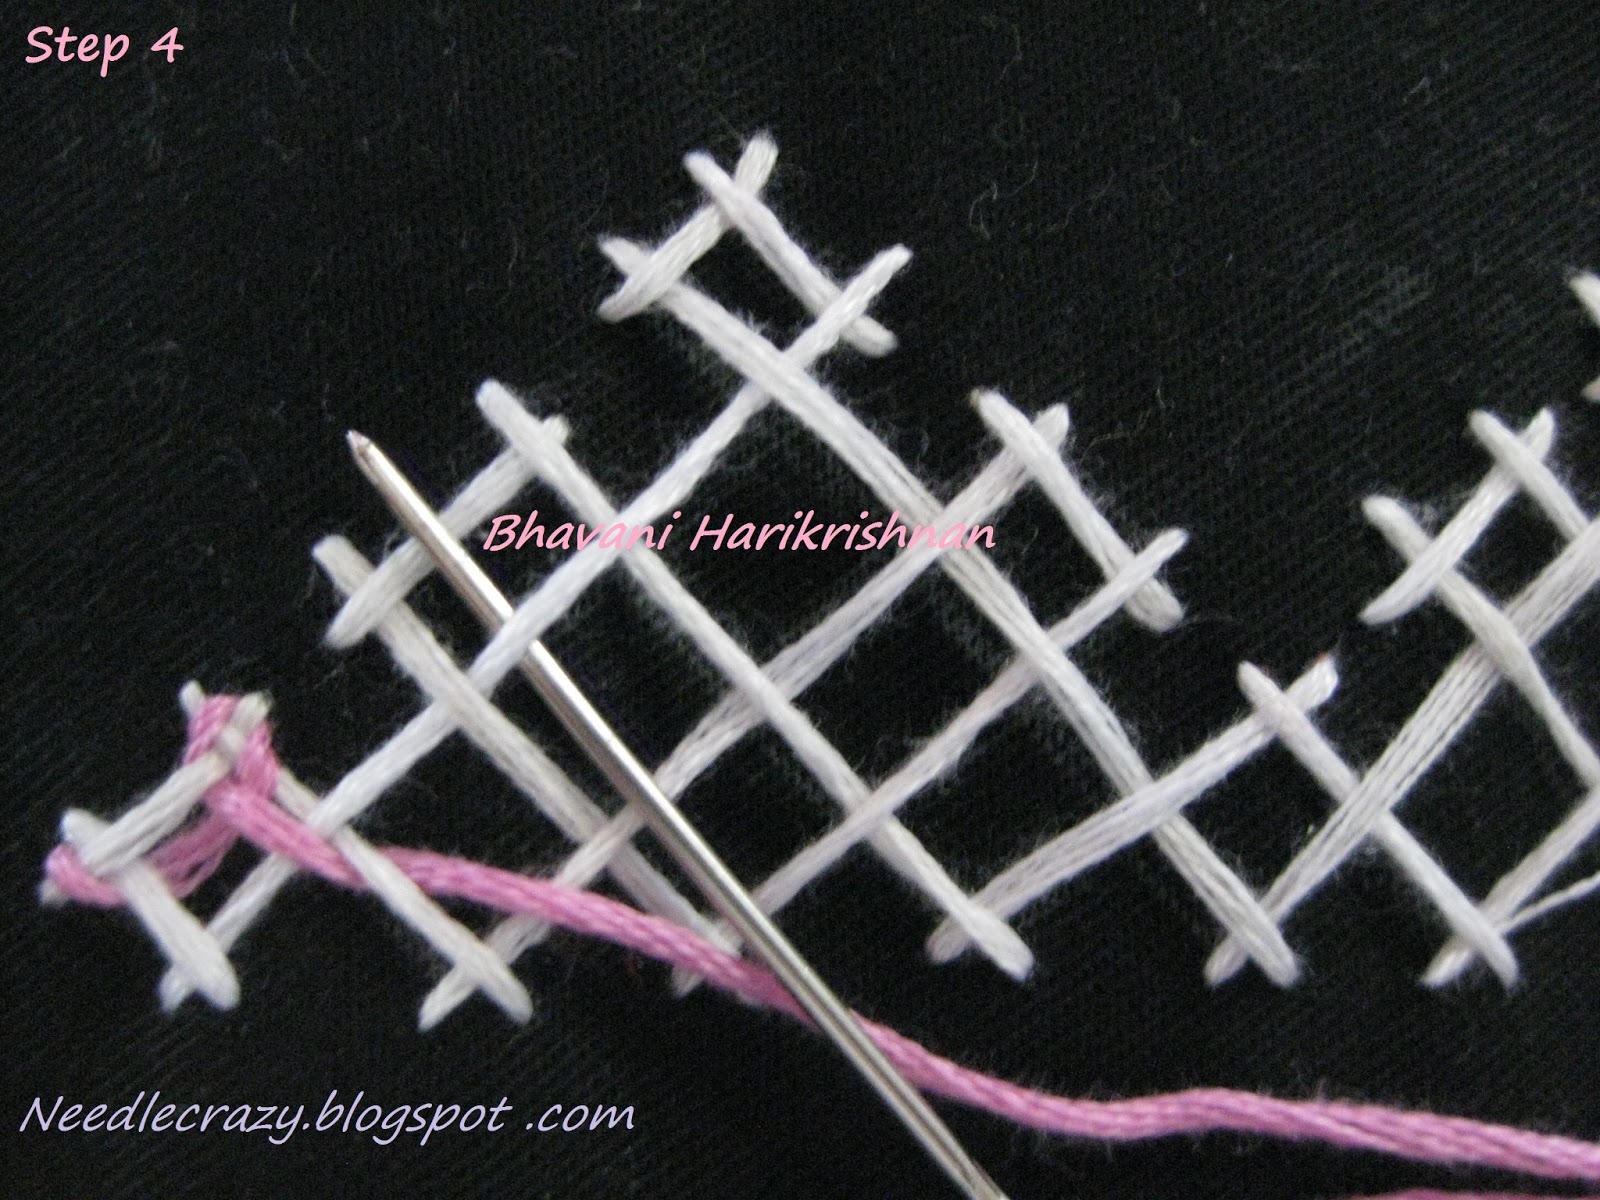
As always, click on pictures to enlarge. They are self- explanatory.


Design on Kurta Part II
Design on Kutra Part III - Skeleton
Design on Kurta Part IV - Interlacing Method I
As always, click on pictures to enlarge. They are self- explanatory.


From here on you'll simply have to repeat from step 1. The next 3 pictures explain how to turn so you can return to the point in Step 1 where you started the interlacing.


Steps 24 to 29 show how to interlacing your way back to the starting point.


Interlacing done. But the center looks incomplete doesn't it. You'll have to interlace it in 2 separate steps.

Steps 31 a to 36 show how it is done.


Anything that's worth doing at all is worth doing well. So do pay attention to the finishing. Making sure you finish at the exact point where you start for a classy look.


So readers, enjoy the challenge and share your experience with me.
Free Kutchwork Design on Kurta Part I - The SketchDesign on Kurta Part II
Design on Kutra Part III - Skeleton
Design on Kurta Part IV - Interlacing Method I